tiny happy

making journal

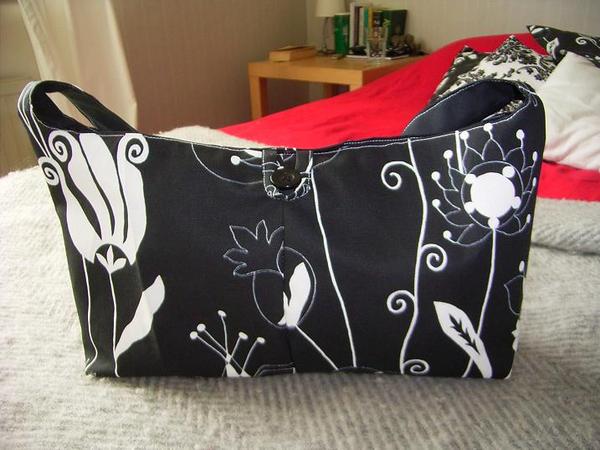
Here’s a rough pattern and guide for making a shoulder bag like one of these, as promised. These are really easy to make, and I always have so much fun choosing fabrics and buttons for them. I have to warn you however that i’m not very good at explaining things in words, so I hope you can understand my general meaning in these directions! Please email me if you need further instruction, and I’ll be happy to help! I couldn’t work out how to do a PDF file so this is a very basic and d-i-y version of a pattern! As you can see, I’ve drawn a tiny, rough and very much NOT-to-scale outline of the pattern which you will need to draw to the proper measurements yourself on some tracing paper or a piece of newspaper. It doesn’t matter if it’s not quite right, as long as it’s symmetrical. The entire length of the pattern is 28 inches. This will make a bag that’s a good size for your wallet, keys and a few books, but it’s easy to make it a bit deeper or the strap a bit longer, if you wish. Just add a couple of extra inches. Umm, and that measurement on the strap should say 18". Sorry about that.

Pattern

Once you’ve drawn and cut out your pattern, cut two from your chosen bag fabric, and two from your lining fabric. I usually use recycled fabrics- old curtains, blankets, vintage bits and pieces… but you could use anything that takes your fancy. Something fairly sturdy for the outside works best though. After cutting these out, I also cut a pocket for the inside, I use some of the outer fabric for this, cut into a rectangle about 8" X 6.5". Then I cut a strip measuring 5" X 1.5" to make a loop with which to fasten the bag to a button, if you choose to use this method. You could also make two ties to fasten, or use velcro or a snap fastener.

1. Start with your outer bag pieces. Place right sides together, and sew the seams at each edge, between the *s on the pattern, like this:

Step1

2. Then open out the piece so that the seams are at the front and back of the bag. Sew along the bottom seam.

Step2

3. Then square off the corners by pinching each one out, then sewing straight across about an inch from the corner’s edge. Trim excess.

Step3

4. Repeat these steps with the lining pieces, but remember to leave a gap in the bottom seam, for turning inside-out later on.

Step4

5. Overlock or zig-zag the top edge of your pocket. Press the edge down about half an inch, and top-stitch. Then press your pocket half an inch all around. Pin to the outside of the lining where you would like it, and stitch it down.

Step6

6. Make your loop for the button. Press in both edges of the strip towards the centre, then fold in half and press again. Sew the edges together (this is just like a bias strip.)

Step7

7. Now sew the lining and outer pieces together. Place one inside the other, right sides together. Match centre seams, and pin. Insert your loop between the two layers on one side of the bag, so the ends of the loop are sticking out, and pin it securely.

Pinning

8. Sew about 1/4" from the edge, all along both sides of the bag, right up to the top edges.

Sewing

9. Now clip like mad around the curved edges, nearly to the seam.

Clipping

10. Turn the bag right-way-out through the gap in the lining. Now press all around the edges of the bag where you have sewn, so that both layers ‘sit’ nicely. Trim the tops of the straps so they’re even and of equal length.

Pressandtrim

11. Sew the top of the strap together- at just the outer pieces. Place right sides together, and sew a 1/4" seam. (This is a bit fiddly under the machine, but it’s okay.) Press down. Then tuck in the lining pieces at this point and hand-stitch it closed.

Handsew

9. Press the strap again and if you are happy with everything, top-stitch a 1/4" seam all around the edges of the bag. Hand-sew the gap in the lining closed. And hand-sew a big button on the front of the bag, in such a position so the loop will fit nicely around it.

Button

10. Ta Da! Enjoy your new bag! I’m off to eat this chocolate.

Chocolate

p.s. please email me a picture if you try this out because I’d love to see it! Also, this is my first time doing instructions like these, so please let me know if I need to make corrections. Thanks!

Posted in

762 responses to “shoulder bag tutorial”

  1. MissMeshell Avatar

    You fabulous, fabulous girl! I didn’t even know you were putting up a tute for these awesome bags but I looked in my bloglines and there it was! :))
    Your instructions are so great, thank you so much for sharing!
    Meshell xx

    Like

  2. Emma Avatar

    Great tutorial! Thanks for the effort of putting it up. I really really adore your bags. 🙂

    Like

  3. Rhiannon Avatar
    Rhiannon

    You’re so, so clever. And so generous to share your instructions too! ❤

    Like

  4. Steph Avatar
    Steph

    This is so beautiful – i’ve been wanting a pattern for these bags for so long, but my baby-wasted brain needed to be SHOWN such things 🙂 AND I now live in New Zealand – you are such a STAR! ❤

    Like

  5. Flibbertygibbet x Avatar

    Oh my, you’re a genius! I’ve been trying to understand a similar bag pattern (which, rather unfairly, didn’t come with a heap of photos for the technically challenged amongst us) and now I think I might just have cracked it!
    Thx from a fellow Refashionista!
    ~ Gail

    Like

  6. joanna Avatar

    Oh my! Thank you for this. Wandered over here via flickr. I’ll have to try this out.

    Like

  7. beth Avatar

    Great tutorial! I made one of these bags tonight, and I’ll take a picture of it for you tomorrow. My only problem in making it was that I skimmed the instructions and then proceeded to not follow them. Predictability ensued. 🙂 But I fixed my mistakes and now I have a fabulous shoulder bag! Yay!

    Like

  8. heather Avatar

    I’m going to make one of these babies today! The shape is really pretty and I love the fabrics you’ve chosen!

    Like

  9. Helen Avatar

    This is so cool! When I get some sewing time, I am going to make one or two 🙂

    Like

  10. katie Avatar

    Thank you so much for this – I have some lovely fabric from the Oxfam shop that I have wanted to make into this sort of bag – I’ll have a go and post if I manage anything half as lovely as the original! the instructions seem really clear to me!

    Like

  11. lyn Avatar

    Brilliant tutorial, thank you !
    xxx

    Like

  12. Carmen Avatar

    Thank you for the tutorial! I love those bags and now I am going to start one!!

    Like

  13. Lisette Avatar

    thanks so much! what a brilliant tutorial – you make everything so clear and reassuring. lovely fabrics too 😉 off to make a bag now – who cares if it’s the middle of the night!!

    Like

  14. beverly Avatar

    Thank you so much! I linked to this on the Knit Sock Kit Swap site, too. I think I found some good refashionista fabrics for this bag in my closet today…

    Like

  15. llynnda Avatar
    llynnda

    The instructions were clear, photos great, can’t wait to make one. What’s next?

    Like

  16. Liane Avatar

    Hey,
    Thanks for the great tutorial…I’m very much an amateur when it comes to sewing but was inspired to try it and was happy with the results. I posted about it on my blog.

    Like

  17. lera Avatar

    great tutorial. (found you on whip-up). I just cut out the pattern on posterboard and plan to try it tomorrow!
    Thanks!!

    Like

  18. Carmen Avatar

    Done! Wondeful tutorial! I love this bag!
    http://polvorondelimon.blogspot.com/2006/06/new-bag.html
    Thanks again!!!

    Like

  19. Regina Avatar

    Love this bag!!! Can’t wait to start one of my own. Thanks so much for the tutorial!!

    Like

  20. Sarah Avatar

    Great tutorial! Can’t wait to try it.

    Like

  21. Egater Avatar

    Great idea! I made my bag last night and it was really simple pattern. Thanks!
    I put my photos to my blog.

    Like

  22. Michelle Avatar

    Adorable bag. Mine can be seen at my blog. Thanks so much for the excellent tutorial.

    Like

  23. anja Avatar

    Thank you so much for the tutorial (I found you through whip-up too)! I made the bag and just posted about it. Thanks again!

    Like

  24. natasha Avatar

    i am afeared of the sewing machine inherited from a friend, although i guess i could sew it by hand. although, it would be a really good first project, methinks. your blog is gorgeous!

    Like

  25. Katie C Avatar

    thanks for the instructions I love making bags and this one looks very easy.

    Like

  26. Emelia Avatar
    Emelia

    I was thinking of making a bag for a trip to New York and your site inspired me. I used a little different design but your tips and tricks really helped. Thanks!

    Like

  27. Joni Avatar
    Joni

    Yeah I have been looking for such a design everywhere. and after reading your comments I think I wll make the pattern out of posterboard and make several for Christimas Gifts.. Was the loop easy to make as well? I really like the idea of self fabric instead of cording for the loop and great BIg button closure. I think I would have to use some sort of spray to keep it from staining if I make it beige what do you think? Do you every sit in on stuff when you take it off and wish it would clean up better??? Just trying to think it out before I start. Bravo and thanks, Joni in Ca

    Like

  28. jean catanzaro Avatar
    jean catanzaro

    Thank you for sharing your bag pattern.The tutorial was great.Very easy instructions.I am cutting my pattern from posterboard.Hope to make the bag this week.I will e-mail you with the results.

    Like

  29. Dragonfly2830 Avatar
    Dragonfly2830

    I have just made a bag similar. Your pictures have helped me with mine and the next one I make.
    I have made my next one a little bigger for me but my daughter loves the one I made her.
    Great site.
    Will save you in my favourites.
    Kind Regards Fiona

    Like

  30. Michelle Avatar
    Michelle

    Oh ta! Nice easy looking pattern and instead of writing ‘i’ll get around to it eventually’ I printed out the diagram and got on with it straight away! My very first bag – how exciting!!! Can be seen here: http://www.flickr.com/photos/oliveonline/176952511/

    Like

  31. teresa Avatar

    I did it! 🙂 Turned out great. Thanks so much for the inspiration and tutorial. I referenced it w/photo on my blog. thanks again!!

    Like

  32. Katherine Avatar

    This is brilliant! I am seriously loving this pattern. I’ve made two as gifts for my son’s playgroup leaders, and now I want to make a huge one for myself. Umm, can I confess I did make a really obvious mistake and joined the straps together with one of them twisted first time around?! So if you ever edited the tutorial, you could add the instruction “check straps aren’t twisted before stitching together” for muppets like myself. Never mind, it was soon unpicked and re-stitched. I’ve posted one of them on my blog, here: http://piksi.typepad.com/piksi/2006/07/bags_of_time.html

    Like

  33. Sarah Avatar

    Recycled/Repurposed Bag


    Found this tutorial (and your blog) yesterday and made a bag this morning. Thank you so much for the great tutorial!

    Like

  34. Donna F. Avatar

    Great Bag, Thanks for sharing! When I get mine done, I’ll send you a link.

    Like

  35. Mary Avatar
    Mary

    I’ve been wanting to make one of these bags forever!! Can’t wait to start..hardest part will be deciding which of my vintage fabrics to use…thanks thanks thanks !

    Like

  36. Mary Avatar
    Mary

    I’ve been wanting to make one of these bags forever!! Can’t wait to start..hardest part will be deciding which of my vintage fabrics to use…thanks thanks thanks !

    Like

  37. June Avatar
    June

    Thank you so much for supplying the tutorial. I’ve been seeing so many bags lately that I’m eager to make one myself.

    Like

  38. Claire Avatar

    Thanks for sharing the tutorial – your version is beautiful – I’d like to make one too now! I can’t have too many bags…

    Like

  39. Miss Dot Avatar

    Great tute! I made one tonight and posted lots of pics on my blog. Your instructions were great, I buggered up the joining of the handle bit but I jazzed it up to cover it! thanks for the tute and the inspiration.
    http://missminnie.typepad.com/minnie/2006/07/immmm_baaaaaccc.html

    Like

  40. Cecily Avatar

    How much fabric TOTAL is needed? I reallllllly want to make one, but I’m not good at math in things like this. 😛

    Like

  41. Kristi aka Fiber Fool Avatar

    I made a scaled down version so that I could use some fat quarters I had stashed. You can see photos on my entry at http://blog.designedlykristi.com/?p=136

    Like

  42. Darcy Avatar

    What a cutie-patootie bag. I’ll have to add this to my list of projects. Thanks for the pattern! 🙂

    Like

  43. michaele Avatar

    I’m also curious to know how much fabric is required – can you send me a guesstimate? Thanks! Cute bag!!

    Like

  44. megan Avatar
    megan

    thanks for the tutorial! i made a smaller version

    Like

  45. SusannaT Avatar

    I am in love.
    I made three already.
    Thank you for the tutorial!
    My bags are here: http://suskianttila.blogspot.com/2006/08/srrrrrrrrrrrrrrrrrrrrrrrr.html

    Like

  46. Carrie Avatar

    I just made a purse using your pattern – it turned out great! Thanks so much for posting a tutorial!!
    You can view a picture of my purse here: http://flickr.com/photos/15361055@N00/212469674/
    I ironed fleece interfacing to the lining to help the bag keep it’s shape.

    Like

  47. sara Avatar
    sara

    hi, this is how my bag turned out. thanks for a good tutorial!

    Like

  48. Mina Avatar

    I had to make the bag right this moment so I didn´t find any nice fabric, well, but now i have a good reason to go shopping ! It´s so easy to make it, thank you so much for being so kind on showing to all of us!

    Like

  49. Wendy Avatar
    Wendy

    Thanks so much for the tutorial. It was easy to follow, and fun to do. The picture of my bag can be found at http://flickr.com/photos/wendyrodrigues/221490754.
    Thanks again!

    Like

Leave a reply to novicesewer Cancel reply